How To Laser Engrave Metal with A Diode Laser?
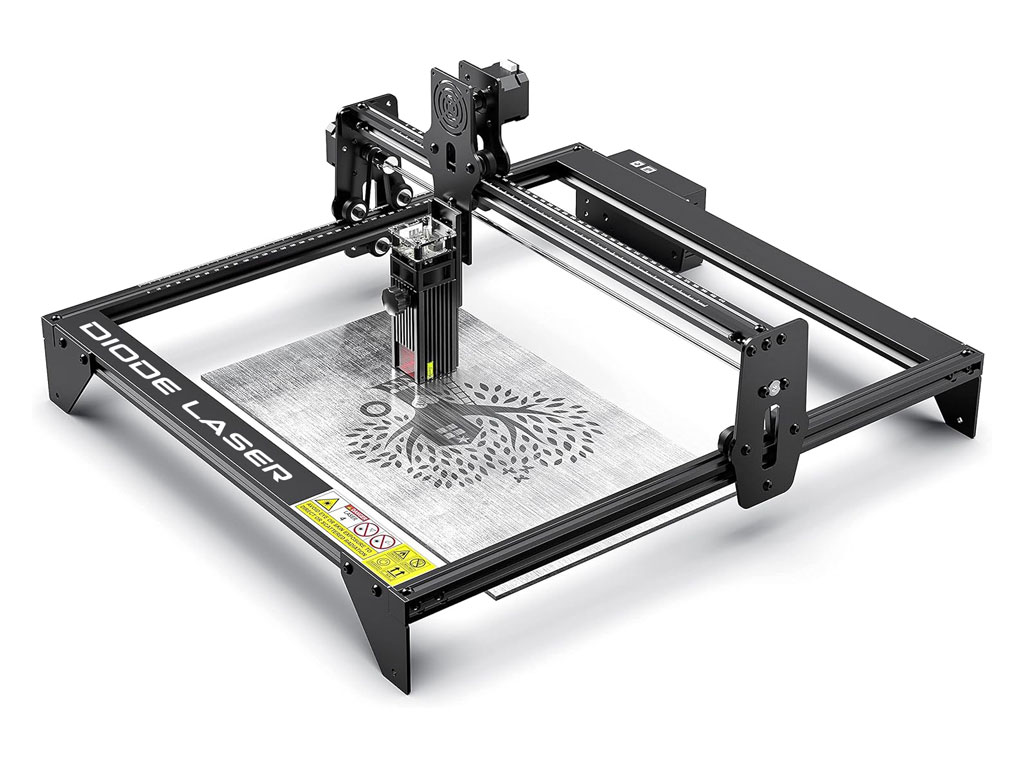
Laser engraving of metals has become increasingly accessible even to makers on a budget. While the diode lasers are at a relative disadvantage compared to the fiber lasers when it comes to power, they are quite capable of impressive engravings in their own right.
From choosing the right diode laser to understanding the possible challenges one may face, this article will show how to undertake best practices in helping you overcome them. By the end of this article, you will have an idea of what you need to get confident with laser engraving in metal, making sharp detailed designs that stand the test of time. Now, let's get into it and start unlocking the potential of diode lasers for your metal engraving projects.

Can You Engrave Metal with a Diode Laser?
Engraving metal with a diode laser is possible, but it requires knowledge of the laser's capabilities and limitations. Unlike fiber lasers designed specifically for metal, diode lasers are less powerful and may struggle with hard metals or deep engravings. However, with the right setup and materials, they can achieve detailed markings and surface-level engravings on softer metals like aluminum or coated surfaces. Using techniques like pre-treating the metal with marking sprays or paints can significantly enhance engraving results.
Diode lasers are flexible tools usually preferred due to their affordable and adaptable nature. In cases where it has worked well with non-metal material, advanced laser technology now allows users to try engraving with metal effectively. With patience and the proper settings, diode lasers will be able to provide appropriate budget-friendly solutions for hobbyists and small-scale projects that require metal engraving.
How to Laser Engrave Metal with Diode Laser?
While the idea of engraving metal with a diode laser may seem challenging, it is, in fact, pretty doable considering proper setup and approach. Diode lasers, not as powerful as industrial fiber lasers, provide an affordable alternative and versatile solution for making small projects. Here is a step-by-step guide in achieving precise and professional results in engraving metal using a diode laser.
Choose the Right Metal and Preparation
Not all metals are suitable for diode laser engraving. Softer metals like aluminum or coated metals yield the best results. To enhance engraving quality, apply a laser marking spray or paste to the surface. These coatings react with the laser, creating a durable and high-contrast mark. Ensure the metal surface is clean and free of dust or grease before applying the spray.
Optimize Laser Settings
Proper laser settings are crucial for effective engraving. Adjust the power, speed, and focus of the diode laser to match the material. Lower speeds with higher power settings work best for engraving metal. Perform test engravings on scrap pieces to fine-tune the settings before starting your final project.
Focus the Laser Precisely
Accurate focusing ensures better energy concentration on the metal surface. Adjust the laser head to the optimal h8 as specified in your machine's manual. Many diode lasers come with adjustable focus lenses or automatic focusing features to simplify this process.
Use Multiple Passes for Deeper Marks
Diode lasers typically require multiple passes to create noticeable engravings on metal. Instead of increasing power excessively, use several passes at moderate power to avoid damaging the laser or the material. Monitor progress between passes to achieve the desired depth.
Work in a Ventilated Area
Engraving metal can produce fumes, especially when using marking sprays. Ensure your workspace is well-ventilated, or use an air extraction system. Safety goggles and gloves are essential to protect yourself during the process.
Post-Engraving Finishing
After engraving, the metal surface should be cleaned of any residues or remnants of spray. Use a soft cloth or mild cleaning solution to enhance the appearance of the engraving. This will make the engravings more prominent and pleasing to the sight.
How to Choose the Right Diode Laser for Metal Engraving?
Choosing the right diode laser is paramount to a high-quality metal engraving. Different models with different features mean one should make informed decisions in terms of the efficiency, precision, and durability of the projects. Here is a guide on how to choose a perfect diode laser for metal engraving.
Consider Laser Power and Wavelength
The power of the diode laser determines the ability of engraving on metal effectively. The minimum or higher power output that a laser should have to engrave on metal should be at least 5 watts. The wavelength is important, too; lasers at about 450nm are normally used for diode laser engraving and yield quite reliable performance on metal surfaces, especially with marking sprays.
Evaluate Compatibility with Metal Engraving
Not every diode laser is made for metal engravings. Ensure that the model of your laser supports engraving on metal surfaces, or at least that it can be used with laser marking sprays or coatings that enhance performance. Look up user reviews and specifications from manufacturers to ensure compatibility.
Focus Adjustment and Precision
A diode laser with an adjustable focus mechanism is essential for engraving metal accurately. Precise focusing ensures optimal energy delivery to the surface, resulting in cleaner and more detailed engravings. Look for features like manual or automatic focus adjustment for added convenience.
Software and User Interface
The software accompanying the diode laser should be user-friendly and compatible with your design needs. Look for machines that support popular formats like SVG, DXF, or PNG, and check if the software includes options for adjusting engraving speed, power, and resolution.
Build Quality and Safety Features
Durability is vital when choosing a diode laser. Opt for models with robust builds and safety features such as protective shields, emergency stop buttons, and reliable cooling systems. These features ensure both longevity and safe operation.
Materials Compatible with Diode Laser Metal Engraving
Diode lasers can honestly be called all-rounders, but in many respects, the possibility of metal engraving again shows itself to be dependent upon material properties and the application of laser marking sprays or coatings. A look at which metals can be worked with, and what you can expect from their engravings.
1. Stainless Steel: Diode lasers can engrave stainless steel effectively when used with a marking spray. This creates high-contrast marks that are durable and ideal for industrial or artistic purposes.
2. Aluminum: Anodized aluminum responds well to diode lasers, producing clear and sharp engravings without additional coatings. For raw aluminum, a marking spray enhances the engraving results.
3. Brass: Brass can be engraved using a diode laser with the help of marking sprays. The process highlights fine details, making it suitable for decorative or branding applications.
4. Copper: The high reflectivity of copper makes it hard to engrave, but a high-powered diode laser can work well along with marking sprays or coatings.
5. Titanium: Diode lasers engrave on titanium, yielding highly detailed designs or text, and are often used in custom jewelry or medical device labeling.
6. Coated Metals: Lacquered or powder-coated metals are engraved so easily with diode lasers because the varnish gets burned away and the base material comes to view.
7. Soft Metals: Diode lasers can do engraving on metals like zinc and tin, though results may vary depending on thickness and reflectivity.
Common Challenges in Diode Laser Metal Engraving and How to Overcome Them
Engraving metal with a diode laser is an exciting process, but it comes with challenges that can impact the quality of your work. By understanding and addressing these issues, you can achieve more precise and professional results.
Insufficient Laser Power
Diode lasers are similar to UV lasers, typically have lower power compared to fiber or CO₂ lasers, which can limit their ability to engrave metals directly. This often results in shallow or faint engravings. To address this, you can use marking sprays or pastes to enhance the engraving effect. Alternatively, choosing a higher-wattage diode laser can improve results for tougher metals.
Poor Contrast in Engraving
Achieving visible engravings on metal can be tricky, especially with alloys or finishes that do not interact well with the laser. Improper power or speed settings often lead to uneven or dull engravings. Pre-treating the metal surface with marking agents or using coated metals can significantly enhance contrast. Regular testing on scrap pieces is also crucial to fine-tune your settings.
Overheating the Material
Heat generated during engraving can warp thinner metals or discolor surfaces. This is especially problematic for delicate or highly detailed designs. Using lower power settings and slower speeds helps control heat buildup. Additionally, ensuring proper ventilation or cooling during engraving can prevent unwanted heat effects.
Reflective Surfaces Interfering with the Laser
Highly reflective metals, like polished aluminum or brass, can scatter the laser beam, leading to inconsistent results. Applying a non-reflective coating to the surface before engraving helps improve absorption and reduces beam scattering. Adjusting the laser angle can also minimize reflection issues.
Inconsistent Results Across Materials
Different metals react uniquely to diode lasers, resulting in varying engraving quality. Experimenting with individual settings for each material and maintaining a log of optimal parameters ensures consistent outcomes. Regular practice and testing are key to mastering diverse materials.
Maintenance Tips for Diode Lasers Used in Metal Engraving
Proper maintenance will go a long way in ensuring long-term performance and quality metal engravings with your diode laser. Regular maintenance will prevent costly repairs, improve results, and prolong the life of your laser system.
• Cleaning the Lens and Mirrors: There is a lot of dust and debris that might accumulate at the lens and mirrors, affecting the focus and power of the laser. Wipe gently with a soft, lint-free cloth with appropriate cleaning solution for all these parts for good performance.
• Check the Cooling System: There is an coolant system that prevents the overheating of a laser. Check the level of coolant and change the fluid for its proper working.
• Grease Moving Parts: With a certain time span, the applied moving parts such as rails and motors are likely to get worn, causing the risk of jamming or misalignment. Put the recommended grease on these parts for their smooth working without mechanical issues.
• Inspect Wiring and Connections: The main cause of this can be loose or damaged wires that may result in performance inconsistencies or even safety hazards. Periodically check the wiring and connections for wear and ensure everything is securely connected.
• Monitor Laser Power and Calibration: Laser power may degrade over time with use, leading to less effective engraving. Regularly check the power output and recalibrate the laser to maintain consistent engraving quality.
• Software Update: Older versions of software contribute to inefficiency and sometimes incompatibility. Always keep your diode laser software updated to take advantage of fresh features and bug fixes.
• Clean the Work Surface: A clean working surface ensures that any possibility of interference from the remains is avoided. Remove all metallic shavings, dust, or residue to have the engraving area fresh and ready for work with accuracy.


